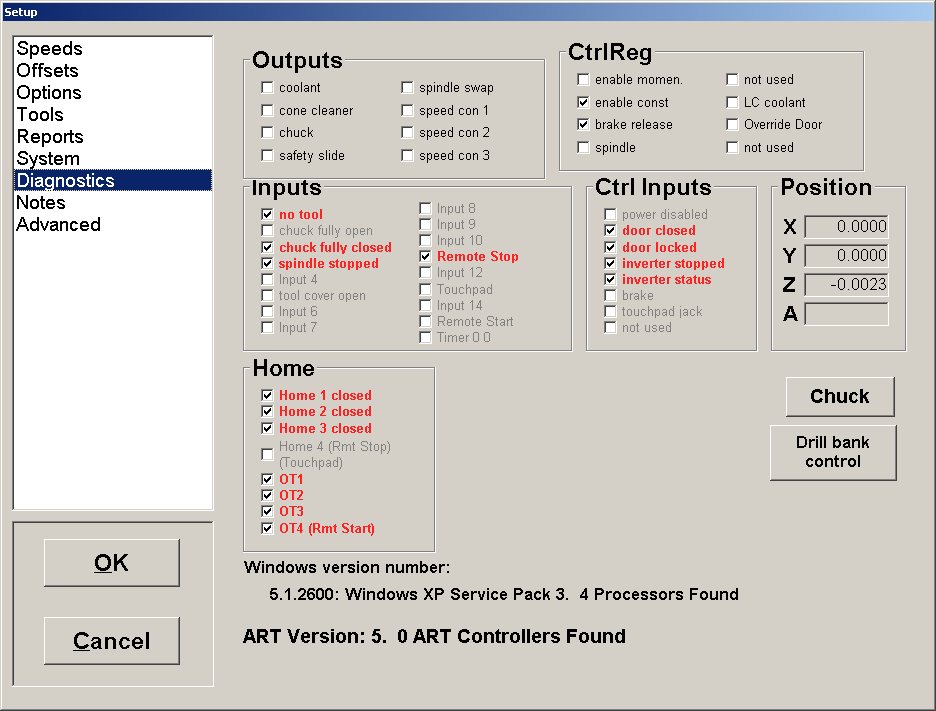
ScenarioThe toolchanger is stopping for an extended period while changing a tool. ProblemTools stuck in tool changerThe system is waiting for a sensor to be in the proper state before continuing with the toolchange. SolutionNo segment of the toolchange process should take more than a few seconds. If other potential toolchange issues have been checked, it is time to check the sensors.
The inputs that need to be checked are the first few under "Inputs". Here is a list of how to test all the inputs: First, check the Spindle signal. If the system thinks the spindle is running, the system will prevent a toolchange from occurring for obvious reasons. In diagnostics, the "spindle stopped" input, 4th down on the left under "inputs", should be red when the spindle is not running. If the "spindle stopped" signal is gray (but the spindle is not spinning), Locate the spindle inverter. The inverter might be off or have an error. Ensure power and that there are no errors on the inverter. For an HSD Toolchanger:
On the top of diagnostics, under "Outputs", there is a box labeled "chuck". Clicking this box will issue a warning, then open the chuck (beware, if there is a tool in the spindle, it will drop). You may also use the chuck menu button on the right side, but note that diagnostics information will not update while the chuck window is open, so it must be closed in between operations.
Close the chuck the same way it was opened, by clicking the chuck button and dismissing the warning.
If the two chuck sensors do not behave as described above, Test the toolchanger sensors. If, when clicking the chuck button, the system does nothing (no hiss, no chuck movement whatsoever), check for adequate air pressure and check the cable that goes between the toolchanger controller and the techno controller. For a Columbo toolchanger:
See File:0298 SAFETY SLIDE INSTALL.pdf for help locating and testing the safety slide. If "no tool" does not change state when the sensor has steel touching it, check the cable that goes between the toolchanger controller and the techno controller. If the cable is good, check the color of the sensor. It should not be black. If the sensor is black, it is likely that the sensor has had steel contact it at high speed and is damaged. Contact Support to obtain a new sensor and follow the File:0298 SAFETY SLIDE INSTALL.pdf guide when reinstalling the safety slide to prevent damaging the sensor again. On the top of diagnostics, under "Outputs", there is a box labeled "chuck". Clicking this box will issue a warning, then open the chuck (beware, if there is a tool in the spindle, it will drop). You may also use the chuck menu button on the right side, but note that diagnostics information will not update while the chuck window is open, so it must be closed in between operations.
Close the chuck the same way it was opened, by clicking the chuck button and dismissing the warning.
If the two chuck sensors do not behave as described above, Test the toolchanger sensors. If, when clicking the chuck button, the system does nothing (no hiss, no chuck movement whatsoever), check for adequate air pressure and check the cable that goes between the toolchanger controller and the techno controller. < |
